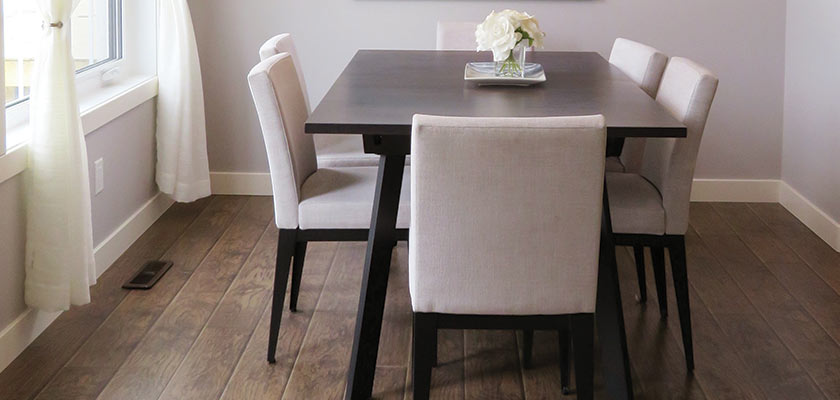
Give your dining suite a new look with some DIY dining chair upholstery! We explain how to upholster dining chair seats step-by-step including prep, upholstering and finishing touches.
Upcycling and refurbishing old furniture is hugely satisfying, and your dining chairs and table is a great place to practice and express your creativity. Whether you have an old set with worn out upholstery that needs freshening, or you picked up a free dining suite from the local garbage tip or a friend, then this article is for you.
We explain how to upholster dining chairs DIY, including essentials tools and step-by-step instructions. By the end of this article, and a bit of time and work on your part, you’ll have an impressive-looking dining chair set that you can use, gift or even sell. Let’s get that creative energy pumping and jump in!
Why Learn How to Upholster Dining Chair Seats?
Nothing is more fulfilling than reupholstering a dining chair yourself. Not only will it save you a lot of money, but it gives you the ability to recycle, be creative, and take a sense of pride and ownership in completing the project on your own.
Save Money
One of the biggest expenses associated with any upholstery project is the labor involved in the project. When you pay a professional to reupholster your dining room chairs, the vast majority of what you are paying for is labor. Save yourself money simply by doing it yourself.
Custom Look
You have complete control over every single aspect of the finished product, when you reupholster the dining room chairs on your own. Rather than haggle and negotiate with a professional upholsterer, you get to choose what fabric, colors, quality of materials, and patterns you will use. You can completely personalize the finished product in any way you see necessary. Royal purple velvet seats with gold painted frames? Pink faux fur with leopard print? Sure, why not, you’re in charge!
Develop Skills for Life
When you take on a DIY project, you have the ability to develop skills that you never knew existed. Take the time to improve your carpentry skills and your ability to assemble everything necessary to create the design you are ultimately seeking. When you gain more practice with upholstering, you will have life skills that can even make you money. There are lots of free, discarded chairs out there, which could fetch a good price after you give it the right kind of care and creative treatment.
Ownership and Pride
You can take pride in knowing that you were the one who completed the upholstery work. Every time that you sit down in your newly upholstered chair, you can feel a sense of accomplishment in knowing that you did it all on your own.
Sustainability and Recycling
Why throw away those old dining room chairs, when you can rejuvenate them with a bit of new fabric. As long as the frame of your existing chairs are perfectly fine, you can upcycle them into something new and exciting. You can even take other people’s furniture out of landfill and upcycle those, too!
DIY Dining Chair Upholstery Tools & Materials
Before you begin any project, it’s important to make sure that you have all the necessary tools you’ll need to get the job done right. This does not just include hammer and nails but also includes all of the safety equipment you will need to ensure that you do not get injured in the process.
List of Necessary Tools
- Staple Gun – learn more about staple guns here
- Heavy-Duty Staples – learn more about suitable staples
- Goggles
- Safety Gloves
- Upholstery Needles
- Sharp Scissors
- Several Different Pliers
- Flat Face Hammer
- Measuring Tape
- Phillips and Flathead Screwdriver
- Putty Knife
- Electric Carving Knife
- Spray Adhesive
List of Materials
- Material of Your Choice
- Foam Padding
- Batting
- Matching Upholstery Thread
- Dust Cover
TIP: Use contrasting fabrics for an exciting look
Using contrasting fabrics, or fabrics with patterns on them, is a great way of adding a little more interest to your living space. When using any form of patterned materials such as plaids or stripes, it’s important to always make sure that the patterns line up once the seat is fully reassembled. This may mean you will need to order more fabric, since you will need to be careful about how you position your fabric, rather than trying to cut as many pieces as possible from the fabric you have.
Related Article: How to Calculate Upholstery Fabric Yardage for Your Furniture Project
Preparation for How to Upholster Dining Chair
Learning how to upholster dining chair seats is not as simple as just sewing it together. Like many creative and art projects, there are several preparation steps before you can get to the fun part.
The process for how to upholster dining chairs DIY:
- Step 1: Remove old upholstery
- Step 2: Prepare the chair (cleaning and drying)
- Step 3: Put on new foam and batting (cut, measure and attach)
- Step 4: How to upholster dining chair (attach new fabric)
- Step 5: Add finishing touches
Don’t expect to do it all in one day, unless you are really energetic.
In most cases, you will want to break your DIY dining chair upholstery project up into parts, across several days, to make it more manageable. We will now explain how to carry out each of those steps, starting with how to prepare your dining chair frames.
Remove the Old Dining Chair Upholstery
Before you can begin to reupholster your existing dining room chairs, you need to start by removing the material from the frame. Make sure that you have plenty of space to work in, and a large flat surface to work on.
Take Reference Photos Before and During Upholstery
One of the most important things to do, especially when first learning how to upholster dining chair seats, is to take lots of photos. Take photos of the dining chair before you deconstruct it, during the deconstruction especially how the corners are upholstered, and the foam and batting once the fabric has been removed. Take photos from all angles, and in particular areas that look like they could be tricky to attach or reupholster, such as corners or chair backs. You will use these photos later if you need to check how it was originally upholstered.
How to Remove Old Dining Chair Fabric and Foam
#1 Separate the seat from the frame
Start by placing your first chair upside down on a work surface, and separate the seat from the rest of the frame. If your dining room chair also has a back, you will want to remove that as well.
The seat and back of your dining chair are usually attached to the frame using either phillips head or flathead screws. Carefully remove all of the screws that hold the seat and the back to the frame, and place them on your work surface, face down.
#2 Remove the dust cover fabric
Starting with the seat, remove the existing dust cover if it is still intact. The dust cover will be held in place using staples, and you should be able to pry them up with a flathead screwdriver and remove them using your pliers. If you accidentally break off a staple, that is okay because you can remove the leg once you have finished removing all of the fabric from the frame, or use your hammer to press it in flush with the board.
#3 Remove the dining seat cover (old upholstery fabric)
Once you have removed the dust cover from the seat, you can carefully remove the seat and back cover. Like the dust cover, the cover for the seat is most likely stapled in place. However, removing the backing can be a little more difficult and, in some cases, you may need to use a seam splitter in order to pull the cover off.
Dining room chairs with backs can be a little bit more difficult depending on the style. Usually, the back of a dining room chair is designed like a slipcover and is pulled over the backing material. Carefully rotate the piece around until you find the bottom point where the fabric is sealed from the outside. It may be stapled, tucked in, or even sewn shut.
#4 Remove the foam and batting
Once you have removed the fabric or other material from the seat and the back, you can remove the existing foam and batting. But first, like you did at the start, take photos of the old foam/batting and write down any notes, which you can use as a reference for when you add the new foam. Once you’ve done that, go ahead and remove the foam and batting from the dining chair. In most situations, the foam will be glued to the frame using some form of adhesive. If this is the case for your dining room chair, you will want to carefully use a putty knife to separate the foam from the wood.
Related Article: How to Clean Furniture Before Painting & Refinishing
Prepare the Dining Chair Frame
After you have removed all of the fabric, material, and foam from the frame, it is time to start preparing your dining chair for the new upholstery. Basically, this just involves cleaning the dining chair frame and ensuring it is neat and tidy, ready for when you start applying the new upholstery material.
How to Clean the Dining Chair Frame
#1 Brush and vacuum the dining chair frame
Working outside, start by removing any residual, built-up dust on all of the hard surfaces on the dining chair frame. This can be a daunting task, but it is important to ensure that the final product looks as bright and resilient as possible. You can use either a soft bristle paintbrush or even your vacuum cleaner with the brush attachment. Gently brush the surface to remove any dust and dirt.
#2 Remove built-up residue
Check the surface of the chair, the bottom, and the back, for any sticky residue. This residue is usually caused by old adhesive. Using a mild solvent, you can remove any residual adhesive material from the surfaces. Gently rub the affected areas until the adhesive has been completely removed.
#3 Wipe down the surfaces
Next, you need to do a spot cleaning. You will want to use a damp cloth to wipe down every single surface of the chair. Make sure that the cloth is only slightly damp to the touch because too much water can damage the wood frame. Carefully wipe down all of the hard surfaces with a mild detergent solution. Do not forget to follow up with a rag dampened by pure water, to remove any residual detergent that may be left behind.
#4 Dry the dining chair frame
Lastly, you will want to make sure that the frame and all of the hardwood surfaces are completely dry before you begin to reupholster the chair. You can wipe down the surfaces with a dry towel, but a good box fan will also do an excellent job of drying off the frame in no time. Alternatively, leave it indoors for a few days to air dry, while you start preparing for the next steps.
Optional: Painting your dining chair frame
Since you’re refreshing the look of your upholstery, now is a good time to look at the frame itself and see if there are ways of improving its appearance. If you have a wooden dining chair frame, you could stain it or paint it to complement the style of your new upholstery. Metal frames can be painted too, with a bit of preparation. You will want to paint or stain the chair frame before adding new foam and fabric.
Attach New Foam and Batting to the Dining Chair
Now that you have a clean slate to start with, it is time to add your new foam and batting to the existing seat and back.
When you disassembled your initial dining room chair, you probably took photos and notes of how the original foam material was shaped. While the old foam has most likely deteriorated substantially since it was brand-new, you can still use that initial shape when cutting the new foam.
How to Measure & Cut Foam and Batting to Fit the Dining Chair
#1 Measure the dining chair seat
Take your tape measure, and start by first measuring the seat to get the length and width dimensions. Pay close attention when you’re taking these measurements because the seat is usually tapered and is generally narrower towards the back than it is in the front. For this reason, it’s important to mark a centerline down the seat and measure from the center to each edge.
#2 Mark and cut the new foam
Once you have the correct measurement, go ahead and mark out the dimensions on the piece of foam. Make sure to use an electric carving knife, as this will yield the best result possible, you can buy them for pretty cheap new or second-hand. While cutting the foam using sharp scissors or a good box cutter is still possible, an electric carver is always the best option. Carefully cut the foam to shape.
#3 Double-check the size is right
Once you have finished cutting the foam, set it down on top of the seat board, and verify that it is the correct size. The foam should be slightly larger than the board because the material will pull it tight once fastened to the underside of the board.
#4 Trim the batting material
After you have ensured that the foam is the correct size and shape, you can then begin to trim the batting material. Lay the foam with the top side down, on top of the batting, and pull the batting up and around the foam leaving about 2 inches of additional material to wrap around the board. Carefully cut the batting material to size.
#5 Glue the foam to the board
When you are ready, carefully spray the top side of the board with your spray adhesive, and wait a few minutes until the adhesive is sticky to the touch. Once it has cured enough that it becomes tacky, carefully set the foam into place. Give the adhesive some time to dry, then carefully place it upside down onto the batting material and staple the material in place.
Tips for dining chair backs
If the back of your dining room chair features a full foam design, then simply repeat the steps for the back. However, the process will be a little more difficult if the back uses a slip-type cover. With a slipcover, you will need to cut your material to shape first, then adhere the foam to the backside of the fabric using a spray adhesive. If in doubt, check the photos that you took earlier, and replicate what was originally done.
Slip-style covers
If your seat back used a slip-style cover, start by cutting your pieces of material to shape. Next, cut the foam to shape, and spray the outside face with a thin layer of spray adhesive. Allow it time to get tacky before setting it on each side of the fabric. Let the glue set up, and once it has completely dried, you can then sew the 2 sides together, inside out. Flip the slip right side out, and pull it over the backboard.
Instructions for How to Upholster Dining Chair
How to Upholster Dining Chair Step-by-Step
Once you have successfully attached the foam and batting to your dining room chair, it is finally time to begin going through the steps for how to upholster dining chair seats. If your original chair used more than one piece for the seat or back, it is important to make sure to create a template from the original pieces.
#1 Prewash & Iron the New Upholstery Fabric
If you are using fabric for your dining chair, then make sure you prewash the fabric so that it does not shrink after it has been attached. Follow the instructions provided by the manufacturer. Also, take the time to iron the material to remove any wrinkles before you start.
#2 Measure & Cut the New Upholstery Fabric
Next, you will need to measure and cut the upholstery fabric to the right size, There are two ways of doing this: without a template, and with a template.
How to upholster dining chair seats WITHOUT a template
To measure the dimensions of the new fabric, lay the original material down on the new material, and trace the outlines using a fabric marking pen or stone. Make sure to leave a couple of inches on all edges, so that there is enough material to work with when you are reassembling all of the pieces.
How to upholster dining chair seats WITH a template
Alternatively, you can create a template. A template is a piece of plastic or paper that has the dimensions of the old upholstery fabric drawn onto it, similar to the pattern that a dressmaker might use. It is normal to create the template while the old fabric is still attached.
However, for this beginner how to upholster dining chair project you can place the old fabric directly on the paper/plastic, then draw the outline of the old fabric on to the paper/plastic plus a couple of inches extra all around. Then using the template, transfer the dimensions onto the new upholstery fabric.
Using a template is good if you are reupholstering several matching dining chairs, as part of a dining set, because you can cut several pieces of upholstery fabric using the one template. This will save time having the measure each one individually, and you are guaranteed they will all be the same shape and size. Just double-check the template measurements are right before you cut all of them!
#3 Prepare for Tufting and Piping (optional – see Finishing Touches note below)
If your cushion has more than one piece, and you plan on adding piping along the seams, then make sure to do this now before you place the cover onto the seat. Likewise, if you are going to tuft the cushion, check to make sure that there are holes in the board so you can pull the buttons tight.
#4 Attach the Fabric to the Dining Chair Frame
Once all of your fabric has been cut, and stitched together accordingly, you can begin to place it on the seat and backboards. Follow these steps:
- Position the fabric. Carefully pull the fabric over the top of the foam, making sure that it lines up properly. This is crucial with the seat bottom, because of the tapered design.
- Staple the front of the dining chair. Once you have pulled the cover over the foam you can begin to staple it to the board. Since the front is the most visible part of the chair, start by placing a single staple in the middle of the front of the chair. Add staples every 2 to 3 inches apart from one another, as you work your way out from the center to the corners.
- Staple the back of the dining chair. After you have completely fastened the front side of the fabric to the chair, spin the chair bottom around and pull the backside fabric tight. Just like you did with the front of the seat bottom, start with a single staple in the center and work your way to the corners.
- Staple the sides of the chair. You will repeat this on each side, saving the corners for last. When working on the sides, however, work back and forth from one side to the other to make sure that the fabric is pulled tightly and evenly across the seat.
#5 Upholster the Corners
Once you have finished all 4 sides, it is time to work on the corners. The corners can be very tricky for most beginners learning how to upholster dining chair seats, but they do not have to be impossible. You will need to carefully fold the corners so that they are tight and clean looking. Always make sure that you fold in the opposite direction on opposing sides, so that the folds are symmetrical on each side.
Related Article: How to Upholster a Corner on Furniture
#6 Trim Excess Fabric
You will need to cut off any excess fabric, but make sure that you leave enough material so that it does not rip out of the staples the first time you sit on the chair. Try to leave about 3/8 to 4/5 of an inch of material past each staple.
Cut the New Dust Cover
After trimming off any excess fabric, you can cut your dust cover to shape and securely fasten it to the bottom side of the seat. For most dining chairs, there will be no need for a dust cover for the back, unless one was there, to begin with.
Finishing Touches
Before you can replace the seat or the back, you need to remove any excess fabric and add the finishing decorative elements. While finishing touches are not essential for learning how to upholster dining chair seats, they do make it interesting and unique. There are a number of different decorative elements that you can add:
Piping
It is commonplace to add piping along the seams, to give it more wear and tear resistance. If your chair has seams, you will need to sew the piping in place as you stitch all of the pieces together. When done correctly, the piping will add more rigidity to the edges of the seat, reducing wear and tear to the foam underneath.
Tufting
Adding button tufting to a dining room chair is an excellent way of adding a little bit more sophistication to your design. The buttons are attached using heavier thread, to pull the button down tightly to the seat. If your chair was not tufted to begin with, you will need to add holes to the seat board prior to adding any foam or fabric. This will allow the thread to be pulled through the board and affixed on the bottom side of the seat.
For a video demonstration on tufting, have a look at this video on How to Tuft Buttons from Labbe Mattresses on YouTube.
Final Tips on How to Upholster Dining Chairs DIY
We hope this article has given you a good understanding of how to upholster dining chair seats for your home, and confidence to try your own DIY dining chair upholstery. As with any projects and new skills development, we suggest you try on a practice chair first, rather than your best dining set, so you can gain an understanding of the process.
In a way, this is ultimately what the process of reupholstering a dining chair is… observing the original chair, and replicating the design with a new piece of fabric, foam and batting. If you feel apprehensive about the steps, consider it a creative project to be completed over a series of days and stages, rather than a chore to be done in one sitting. If it still looks overwhelming, then you could instead start with an easier project, such as upholstering a stool before tackling your dining chairs.
Once you’ve reupholstered your dining chairs, next up, learn how to upholster a chair cushion for a sofa or comfy chair.
Happy upholstering and upcycling!
Author
-

Hey, I’m Sara, co-owner of NestKoo! I’m a graphic designer and professionally trained fine artist, with a Bachelor of Arts (Fine Art) majoring in Painting. I love being close to nature, sustainable living and bringing new life to old things. My specialty in NestKoo is DIY house painting, upholstery and furniture upcycling, where I bring my skills in fine art painting and contemporary design together into a practical home DIY context.
View all posts

