How To Install Barn Door Hardware: DIY Guide
Keen to get your new barn door up and running? In this guide, we explain how to install barn door hardware, including hangers, rail and floor guide.
So you’ve probably been flicking through some home and garden magazines, and keep seeing these stunning DIY barn doors and you wish you had one. You probably think it’s too expensive and you probably won’t be able to afford it anyway.
However, the good news is getting a custom-made barn door is now within reach and surprisingly pocket-friendly, especially if you decide to go with upcycled materials for your barn door in true country style. It all gets even better, you can do it yourself!
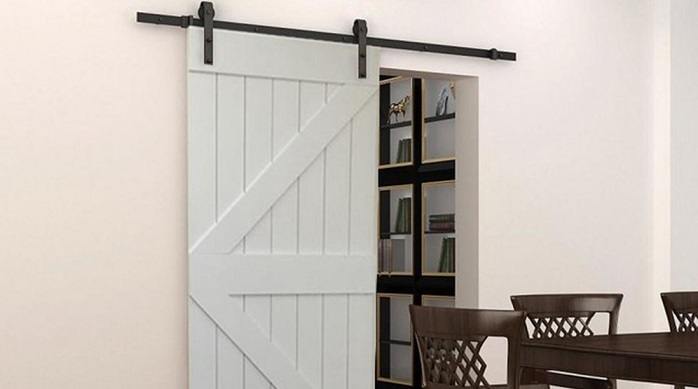
For your barn door to work properly, however, you will need to buy some special hardware. We generally call this barn door hardware, which are usually purchased in the form of a kit: one for the top (hangers and rail), and one for the bottom (floor guide). Once you’ve picked up these kits, make sure to follow this tutorial step-by-step to set yourself up with a custom barn door that you’re going to love!
Step-by-Step Barn Door Hardware Installing Guide
Now, before anything else you should know the measurements of your door and the vertical and horizontal wall space. We’ll be doing a tutorial on a single barn door hardware. Once you get the hang of it, then you’ll be able to install a bypass rail system.
You might be a little confused about the measurements for the hardware. The good news is the process of getting the correct sizes is very easy. You should measure the width of your door then multiply it by 2 then add 4 inches. The extra 4 inches is to allow a little room for error.
When it comes to the height, consider the header space and the ceiling height. For a great installation, you’ll need a minimum of 6 inches to 8 inches of header space, to enable you to fit any design.
Tools you’ll need:
- Drill bit ⅜” – ½”
- Drill
- Speed square
- Tape measure
- Clamps
Step 1: FIX THE HANGERS.
Attaching the hangers is the first thing you’ll need to do on the top of the barn door. You’ll attach one near each end. Your hangers placement will depend on which style of door you have.
Install them between 3″-6″ from the border of your door to the center of the hanger. You can try and do the placements differently to see which one will fit your setting, as you do that ensure you don’t get too close to the border of your door.
The next step is to take your speed square and pass the hanger through it clamping it temporarily, ensuring it doesn’t shift in place.
This helps you get the right horizontal placement and the next thing you want to do is to find the right vertical placement.You can easily figure out your vertical placement. You’ll need to add the anti-jump cap width plus the width of your rail and ½ of the depth from the hanger groove.
The gap between the top of your door and the bottom of the hanger will be the total you get from the above measurements.
Use the already drilled holes on the hanger to guide you and drill ⅜”-½” holes. Insert the flat bolt head towards the wall then towards the outside of the door place the acorn nuts.
Repeat the same process on the other end ensuring you have tightened each end fully.
Step 2: FIX A HEADER BOARD.
It’s recommended to make use of a header board such as one of these examples when installing. This is because some homes might have installation holes already drilled and others don’t have. It’s up to you to choose the size of the header, pick one that matches your needs.
The recommended size mostly is 1×6 or 1×4. Note that the header board should be 2″ above the height of your door.
Step 3: INSTALL THE RAIL.
You should mount the rail on the header board. The measurements of the rail you use will depend on the height of your door.
- Mark the first hole on the headboard by overhanging the edge of the rail 3″-5″. Use a 3/16 drill bit to pre-drill a hole.
- Hold up the rail on one side and line it up with the first hole, then tighten the bolt but not all the way.From the center of the spacer you attached across the whole length of the door, mark a straight, level line.
- Mark holes where remaining bolts will be installed by pivoting the rail. Start attaching from the far end of the rail first then afterward the other holes using one spacer and bolts on the already drilled holes.
Step 4: FIX YOUR FLOOR GUIDE.
Installing your floor guide is the next vital step.
- T-guide Installation: for this style of floor guide, cut a groove on the edge at the bottom of your door so the guide can slide in. Note that the groove should be at the center of your door.
- Wall-mount Guide Installation: this style of guide is really easy since you don’t have to groove your door and it’s also wall-mounted.
The kit and guide you purchase should come with full instructions for installation. Since models and styles vary slightly it is impossible to give a one-size-fits-all set of instructions for this section, so make sure to follow the manufacturers manual for this bit.
Step 5: PUT UP YOUR DOOR.
- Fix your barn door mindfully after the floor guide is in place.
- After fixing it, slide the barn door.
- Ensure the door is plumb without having to support it in place.
Step 6: PUT THE DOOR STOPS IN POSITION
- Have your barn door in a closed position and slide one door stop up against it and snug all the way.
- Next, slide the door in the open position and put the other doorstop.
Final Thoughts on Barn Door Hardware Installation
I’m sure before you read through the tutorial, you probably thought you’d never get your dream barn door in place. However, we did it! You have your beautiful barn door fully installed by you. You can get to relax, sit back, and enjoy looking at the amazing work of your hands. As you saw at the beginning it’s not so hard, that’s as easy as it gets.


Leave a Reply
Want to join the discussion?Feel free to contribute!