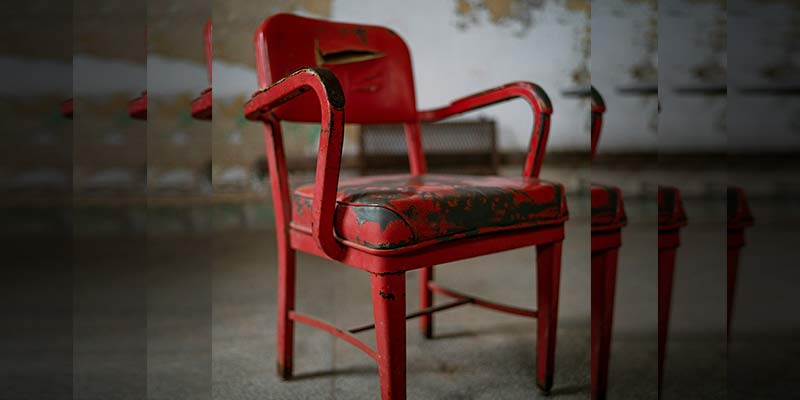
Upcycling your old furniture is a sustainable and rewarding way to bring new life into your living space. In this guide, you’ll learn how reupholster a chair that you found for free or cheap.
And of all the pieces of furniture in your home that you could transform, nothing is more impactful than a chair. Reupholstering your chairs may seem daunting, but with the right tools, materials, and instructions, you too can achieve professional-looking results in no time. In this hands on guide, we guide you through how reupholster a chair yourself, that you found for free or dirt cheap, from cleaning and prep to attaching fabrics.
Tools & Materials
Choosing the Right Chair to Reupholster
Before you can begin your project, you must select a structurally sound chair. While some may already have an excellent chair in their home, others choose to head out to the local garage and rummage sales in their neighborhood to find the perfect candidate for their upcoming project. Take your time to look for a chair that has a solid, hardwood frame because these are more durable and a lot easier to work with. At the same time, make sure that you avoid any chair that has significant damage, or appears to be unstable in any way. Repairing unstable chairs can be a very difficult task even for a seasoned professional.
Essential Upholstery Tools & Supplies
To get professional-looking results every single time, you must make sure you have the essential tools to complete the project. Here are some of the most important tools that every home DIYer should have in their tool chest.
- Staple Gun – read more about staple guns here
- Upholstery Staples – read more about upholstery staples here
- Screwdrivers
- Pliers
- Scissors
- Tape Measure
- Upholstery Needle
- Hammer
- Seam Ripper
- Chalk or Fabric Marker
It is also important to make sure that you have the correct upholstery supplies. Take your time selecting your fabric, the padding that you plan on using, thread to match the fabric, and other important upholstery supplies needed to complete the job professionally.
- Upholstery Fabric
- Foam Padding
- Batting
- Upholstery Thread
- Dust Cover Fabric
- Upholstery Tack Strips
Lastly, always make sure to follow basic safety precautions. To ensure your safety while working on a DIY project, you must have basic safety equipment in your toolbox.
- Safety Glasses
- Leather Gloves
- Respirator – read more about choosing a suitable respirator
- Ear Protection
Fabric Measurements: How Many Yards to Reupholster a Chair?
When it comes to determining the cost and budget of any project, it’s important to first determine exactly how much material you need to complete the reupholstering. The amount of fabric that you will need for your particular project will vary depending on the size of the chair and its particular style. For example, a standard dining room chair will generally only need about 2 to 3 yards of fabric. However, larger, armchairs, may need as much as 4 to 5 yards of fabric or more. To ensure that you get the correct amount of fabric, take the time to measure all the parts of your chair and add a few inches to account for seams and stapling.
The Cost: How Much to Upholster a Chair DIY?
Reupholstering a chair on your own can be an excellent way to save money when compared to using a professional service. However, it is important to remember that there are many factors to take into consideration when determining just how much a DIY chair reupholstery project would cost.
- Fabric: $10-$50 per yard, depending on quality
- Foam padding: $20-$50
- Batting: $10-$20
- Tools and supplies: $30-$60
Preparing to Reupholster A Chair
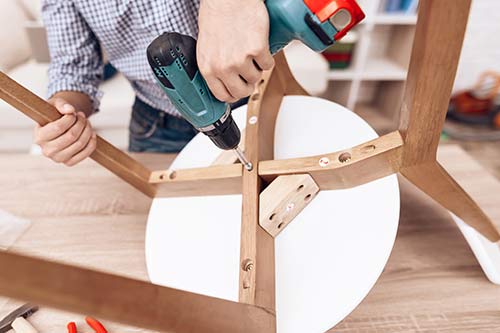
Before you can begin to reupholster the chair, it’s important to take the time to do the proper prep work. This includes taking the chair apart, cleaning all of the parts that will be kept, and checking for possible damages.
Taking Apart the Chair
Safe Removal of Old Fabric
You want to start by turning your chair upside down and removing any dust cover fabric that is used underneath the seat. Since this fabric is generally stapled in place, you will want to use a flathead screwdriver to lift the old staples, then use a pair of good pliers to pull them out. While it may be tempting to simply cut through the dust cover, be careful because doing this will release a lot of airborne dust that may cause respiratory issues for some.
Labelling Pieces for Reassembly
As you begin to disassemble your chair, take the time to take photos of the project as you go. This will help to ensure you know where everything belongs during the reassembly process. You may also want to take the time to label each piece. When removing pieces of fabric, try to remove the full piece and label accordingly, so that it can be used as a template for cutting the new fabric.
Removing Staples
Take your time and make sure that you remove all of the staples from the old chair before you begin to work on the frame. Even a small piece of a staple can stick out and cut your hand while you are working on it, and that could result in tetanus.
Making Important Decisions
Does the Padding Need to Be Replaced?
After you have removed all of the fabric, it is time to inspect the foam padding carefully. You will want to look to see if it has been worn down or is flattened in any spots, and if it is damaged in any way, then it will be best to simply replace it. For most furniture projects, you will want to make use of a high-density foam that is specifically designed for use in day-to-day household furniture.
Is the Frame Cracked?
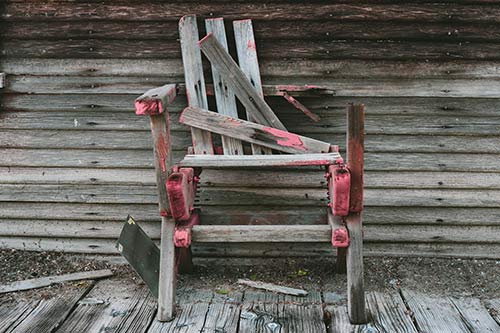
This is why it is so important to make sure that you select a chair that does not have any instability issues to begin with. Now that you have all of the fabric and padding removed, you can take a closer look at the wooden frame and all of the joints. Carefully inspect the frame and joints for any cracks or looseness. You will want to repair and/or reinforce any weak spots before you begin to reupholster.
This is also the time to decide if the chair frame needs a new coat of paint or wood stain, and do that before you replace the upholstery.
How Reupholster A Chair: Renewing the Padding
For most DIY chair reupholstery projects, you will most likely need to renew the padding.
Adding New Foam or Batting for Extra Comfort
Cutting Foam
Hopefully, you carefully removed the old foam from the chair and kept it so that you could use it as a template. Place the old cushion onto the new foam sheet, and carefully draw around the shape. Before you cut the foam, you will want to compare it to the wooden base, to make sure that it is a perfect match. For best results, it is recommended that you use an electric knife to cut the high-density foam.
Attaching Foam
While the original foam may not have been permanently attached to the seat base, to prevent it from shifting during use, it is important to make use of a spray adhesive. To attach the foam, you will want to spray both the base and the bottom side of the foam first, giving it time to tack up before sticking the two pieces together.
Adding Batting
After you have added the foam, double-check to make sure that is the correct size for the cushion, then wrap it with a layer of foam batting. You will want to cut the batting just larger than the foam piece itself so that it can wrap around the sides of the foam and get stapled to the base. Just like you would when applying the fabric, you will want to hold the foam batting tight and staple it underneath.
Considerations for Different Materials
Foam
When it comes to selecting the perfect type of foam for your reupholstering project, it’s important to remember that they come in many different densities. Although a low-density foam might be perfect for use on a bed, it is generally not good for use on a high-traffic piece of furniture like a chair. At the same time, a medium-density foam might be great for the armrest, but it is generally recommended to use high-density foam for seat cushions.
Batting
There are also various densities of batting available to choose from today. Your decision at this stage will help ensure that the edges of the foam are smooth once wrapped with the fabric. If you choose not to use batting, you want to make sure that your cuts are perfectly smooth or otherwise they will be visible after you pull the fabric tight and staple it to the underside of the base.
How Reupholster A Chair: Reupholstery Process
Once you have taken all of the necessary steps to prepare your project for the reupholstering stage, it’s time to start cutting and placing the fabrics onto your chair.
How Reupholster a Chair Seat
Cutting Fabric
Hopefully, you kept the original seat fabric, so that you can use it as a template for the new fabric as this is a crucial step when determining how reupholster a chair. If the original seat was a one-piece, then simply lay it out on top of the new fabric and cut it to size, adding a few inches on all of the sides to allow for stapling. However, if the original seat was composed of multiple pieces of fabric, you will want to use a steam splitter to separate each piece and use these pieces as templates for the new fabric.

Placing Fabric
Start by centering the new fabric over the seat foam, and pull it tight at the center of each side. As a general rule of thumb when it comes to how reupholster a chair seat, you always start in the middle of each side and slowly work your way into the corners. Remember, the corners are a lot more difficult to get right because you will need to fold them to ensure that they are straight and professional-looking.
Corners
Lastly, you will want to fold the fabric neatly at the corners. Take your time when folding the corners, to ensure that you are creating smooth, clean lines. Remember, it’s important to ensure that you get the fold correct before you begin to staple, as removing the staples to fix a corner later can be a difficult process.
How Reupholster a Chair Back
Cutting Fabric
For most chairs, reupholstering the back is done in the same manner as the seat. When working with a single piece of fabric, you will want to use the original cover as a template to cut the new piece of fabric, as this is the best process for those wondering how reupholster a chair. If your seat back was composed of several pieces, you will need to rip the seams apart and make templates for each piece before sewing them all together.
Attaching Fabric
Just as you did with the seat cushion, you will want to pull the fabric tight at the center point of each of the sides and staple them first. Slowly work your way from the center how to the corners, paying close attention to the alignment of the thread pattern. Folding the fabric around the corners will be slightly different when working with the back since this portion of the chair is generally not as straight as the base was. This is why taking photographs as you disassemble the chair is so important.
How Reupholster a Chair Arm Rest
Cutting and Attaching Fabric
The armrest can be quite difficult, due to the bulbous shape of the foam. Likewise, some armrests feature very fancy-looking ends that may require more patience when folding down smoothly. As always try to use the original fabric as a pattern to cut the new pieces for the armrest. Since you will not be able to pull tight along 4 sides when attaching the fabric to an armrest, make sure to start in the middle of the longest sides, and work towards each end.
How Reupholster A Chair: Getting A Professional Finish
Stapling
To ensure that you obtain a professional-looking finish, you want to make sure that the stapling is done properly. When it comes to how reupholster a chair, always make sure that you pull the fabric tight before you staple it to the underlying wood. And, always make sure that you start from the center of each side and work your way out to ensure that the fabric is stretched evenly. If this is not done, then the pattern or weave will look off or appear wavy.
Trimming Excess Fabric
At the same time, it is important to make sure that you add an additional inch along each side, to give you plenty of fabric to work with. Once you have stapled everything down, it is then time to start trimming away any excess fabric left over. Be careful about getting too close to the staples, because if you leave less than one-quarter of an inch, there is a chance that the fabric can fray. As such, you want to leave about 1/4 inch to 3/8 inch of fabric beyond the staples.
Finishing Edges
For attaching fabric to areas of the chair that are exposed, such as the back, you’ll most likely need to make use of an upholstery tack strip. These are crucial to ensuring that you can securely fasten the fabric to the back of the chair, without the ends of the fabric being visible.
Dust Cover
Lastly, always make sure to attach a new dust cover to the underside of the chair as this will help to hide the staples, give the chair a finished, professional look, and also prevent dust particles from the decomposing foam from getting all over your home.
Putting It Back Together
Reattaching Pieces
Once everything has been reupholstered, it is time to start putting everything back together. You’ll want to make use of the photos you took when disassembling the chair, as well as any labels, to ensure that you can put everything back into its proper place. This is crucial, because using the wrong screws from a different part of the chair may damage it.
Ensuring a Secure Fit
Double-check and make sure that all of the connections and joints of the chair are sturdy and extremely secure. You will also want to take a moment to sit down in the chair to test its comfort and stability. Be careful when doing this, especially if you had to do repairs to the frame after the disassembly process.
Final Touches
Inspecting for Flaws
Finally, place the chair in the middle of the room and walk around it. Look over the entire chair from every single direction, paying close attention to any loose staples, uneven fabric, or any other form of imperfection. Take the time to adjust it now before you put the furniture back into your living area.
Cleaning
The last thing for you to do when it comes to how reupholster a chair, is to wipe down the chair to remove any dust and debris that was caused by the reupholstering process. Chances are, you will find a lot of dust left over from the foam itself, stuck in all of the nooks and crannies of the chair’s frame.
There you have, you’ve learnt how reupholster a chair yourself!
For more chair upcycling guides, learn how to upholster stools, an office chair, an ottoman footstool, and dining chairs here.
Author
-

Hey, I’m Sara, co-owner of NestKoo! I’m a graphic designer and professionally trained fine artist, with a Bachelor of Arts (Fine Art) majoring in Painting. I love being close to nature, sustainable living and bringing new life to old things. My specialty in NestKoo is DIY house painting, upholstery and furniture upcycling, where I bring my skills in fine art painting and contemporary design together into a practical home DIY context.
View all posts


