Looking for ways to freshen up venetian plaster in your home? Painting over Venetian plaster is one way to give your home a modern ancient look. In this guide, we explain how.
Venetian plaster makes your walls outstanding, and a fresh coat of paint to highlight it gives your home a sense of rustic charm coupled with classic beauty. It is very attractive.
As discussed in this article from Architectural Digest, venetian plaster is a mixture of fired limestone combined with water. The mixture gets complete by adding lime plaster. Painting over Venetian plaster in your home has many benefits, but is also more challenging. Below are the steps of painting and the advantages of painting a Venetian plaster. Let’s get started on how to paint over Venetian plaster.
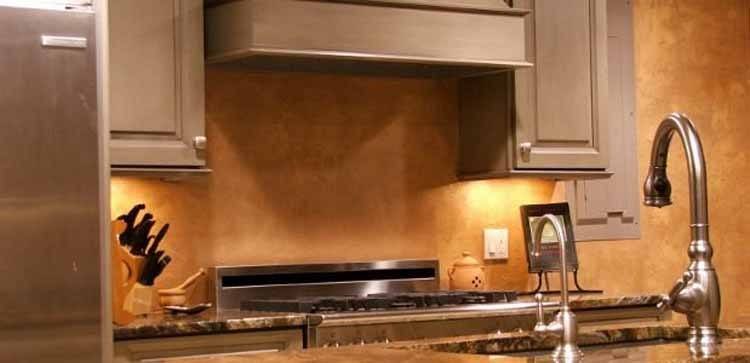
Steps to Painting over Venetian Plaster
Painting over Venetian plaster needs some basic knowledge of painting, which we cover in our guide to painting indoors here and numerous other articles in the NestKoo painting section. Before starting the painting process, you need to make sure you have the necessary equipment for painting. Below is what you should have:
- Paint brush and roller/tray.
- Paint in your chosen color and finish.
- Paint trays.
- Primer (water-based).
- Painter’s tape.
- Clean lint-free towel, and mineral spirit or water and detergent.
- 80-120 sandpaper and handheld electric sander.
- Paint stripper or heat gun & scraper, to remove old paint.
With all the above equipment, it’s time to start your painting process. Below are some simple steps to paint a Venetian plaster.
Step 1: Remove the old layer of paint from your wall (optional)
Ideally, you should not paint on top of the previous coat of paint. As the paint gets old, it will develop dust or grease, especially in a kitchen. Thus, it is advisable to remove the previous paint before adding a new coat of paint to your Venetian plaster. There are numerous ways to remove paint from a wall, but two common methods are:
- use a heat gun with a scraper
- use a solvent paint stripper with a scraper.
However, with the delicate nature of Venetian plaster walls there is a risk both of these methods could damage the texture of the wall. If the previous coat of paint appears very well adhered (no flaking, chipping), then you could try going ahead without removing it. If it is flaking, you will most definitely need to look into removing the paint, however.
Step 2: Cover small holes and imperfections in the Venetian plaster
Once you’ve removed the old paint, inspect the wall for any damage and patch up any holes or gouges with a specialty lime plaster filler before painting. You can find this from your local hardware store, with the putty and compounds.
Do not paint the wall before covering those tiny holes, as they will be very visible and unsightly after painting. Filling in holes will ensure you have a perfect and smooth surface. Allow the filler to dry fully before you start the painting process.
TIP If patching large areas, roughen the texture to match the surrounding Venetian plaster
If you have filled in a large area, you may need to fix the texture, to match the surrounding Venetian plaster. As we know, Venetian plaster has a particular texture to it, and if your filler is perfectly smooth it will look out of place. Therefore, you will need to replicate the Venetian plaster look, to help it blend in.
There is a great video here from Golden Paintworks that shows how to repair Venetian plaster and achieve the right texture, that is worth looking at before you get started:
Step 3: Clean the wall
The second step after patching up the holes is to clean the wall. Use the clean lint-free towel and mineral spirit to rub the wall, or water with mild dishwashing detergent. Make sure you use a lint-free cloth, so you don’t get cloth fibers stuck to your wall. After cleaning off all the dust and grime, let the wall dry before you start the next step.
Step 4: Sand the wall
After the wall is clean, it is time to make the wall smooth and ready for the painting process. Sanding the wall also helps in removing the stubborn stains.
Use 80 grit sandpaper in your electric sander, followed by 120 grit sandpaper for a perfect result.
Clean with a damp cloth to complete the sanding process.
Step 5: Cover the places you do not need to paint
Before you start the painting process, use painter’s tape on any surface you do not want to paint. Take special care around electrical outlets, cables and switch plates. Do not forget to cover the floor with drop cloths or old bed sheets, to prevent the paint from dripping on and ruining the floor.
Step 6: Apply primer over the Venetian plaster
With everything covered, it’s time to start applying primer to the surface. Before painting the Venetian plaster, you need to apply the primer first. The primer is a crucial step that ensures the durability of the paint, without it your paint has a greater likelihood of flaking and or being scratched off.
Before you start priming, make sure you follow the guidelines from the manufacturer, as different brands will have their own quirks.
Stir the primer well in the tin, using a paddle or other stirring device (a large flathead screwdriver works). Next, pour the primer into your roller tray and start rolling it on the wall. Use a good quality brush to apply primer on the wall in hard to reach places.
For instructions on how to roll primer on a wall, have a look at our article on painting interior walls here.
Step 7: Paint the primed wall
After the wall is primed, it is time to apply the paint on the wall. Like with the primer, check the manufacturer’s instructions before you start applying the paint to the Venetian plaster, for specific requirements for the brand you purchased.
As with the primer, pour mix the paint, pour into a roller tray, and start rolling the paint onto the wall. Use a brush to paint the hard to reach areas, where the roller cannot get to.
Alternatively, you can also consider using a spray painter for a perfect result. When using a painting spray, you should spray at low pressure. More information on using paint sprayers on interior walls is in this NestKoo article.
After your first coat has dried, inspect it and assess whether it needs a second coat. In most cases a second coat is desirable for a more even paint finish, but is not an absolute must to add another layer if you applied the primer well and the underlying primer color is similar to the top coat. If you are unsure, I would suggest adding another coat for peace of mind.
TIP Remove painter’s tape while the paint is still wet.
After the painting process is over, remove the painter’s tape when the paint is still wet. If you remove the tape when the paint is dry, it might damage the wall ends. It is also easy to touch up the ends with a brush when the paint is wet, which is good to do especially if any paint seeped under the tape unexpectedly.
Step 8: Allow to dry, ventilate the room and clean up
Good work, you’ve now painted your Venetian plaster!. Next is time to clean up your paint brushes and roller. Ventilate the room with a fan to speed up the drying process and clear out the paint fumes.
Final Thoughts on Painting over Venetian Plaster
Have you been wondering how to paint over Venetian plaster and whether it is something you event can, or should, do?
Many people like the look of Venetian plaster as it is, so naturally you might be wondering whether you should paint over the Venetian plaster at all, or leave it as is. This is a personal choice, and depends on your personal aesthetic. There are a few benefits to painting Venetian plaster, however.
Of course, there is the color, if you decide you want a change in look. The ancient look of Venetian plaster is appealing to many people, but some people like myself can find it tiresome after a while and want something more contemporary looking.
In addition to the color and design aesthetic, certain paints can have fungicidal properties, and can prevent mold growth on your walls. Plus, paints designed for kitchen are often formulated to be easy to clean, and resist grease build up caused by cooking, making the paint finish easier to clean.
Happy painting!
Author
-

A jack of all trades, Todd has been a DIY enthusiast, traveler, and writer for many years. He has a deep understanding of all types of painting tools and door hardware, and has shared many articles on these topics throughout the years.
View all posts

